Monday, December 21, 2009

Boto 1.9a released

Hi -

I have just uploaded a new version of boto to the downloads section at http://boto.googlecode.com/. Version 1.9a is a significant and long overdue release that includes, among other things:
  • Support for Virtual Private Cloud (VPC)
  • Support for Relational Data Service (RDS)
  • Support for Shared EBS Snapshots
  • Support for Boot From EBS
  • Support for Spot Instances
  • CloudFront private and streaming Distributions
  • Use of POST in data-heavy requests in ec2 and sdb modules
  • Support for new us-west-1 region
  • Fixes for more than 25 issues
Other than bug fixes and support for any new services, the bulk of the development effort from now on will focus on the boto 2.0 release. This will be a significant new release with some major changes and exciting new features.

Mitch

Wednesday, December 16, 2009

Private and Streaming Distributions in CloudFront

Boto has supported the CloudFront content delivery service since it's initial launch in November of 2008. CloudFront has recently launched a couple of great new features:
  • Distributing Private Content
  • Streaming Distributions

While adding support for these features to boto, I also took the opportunity to (hopefully) improve the overall boto support for CloudFront. In this article, I'll take a quick tour of the new CloudFront features and in the process cover the improved support for CloudFront in boto.

First, a little refresher. The main abstraction in CloudFront is a Distribution and in CloudFront all Distributions are backed by an S3 bucket, referred to as the Origin. Until recently, all content distributed by CloudFront had to be public content because there was no mechanism to control access to the content.

To create a new Distribution for public content, let's assume that we already have an S3 bucket called my-origin that we want to use as the Origin:


>>> import boto
>>> c = boto.connect_cloudfront()
>>> d = c.create_distribution(origin='my-origin.s3.amazonaws.com', enabled=True, caller_reference='My Distribution')
>>> d.domain_name
d33unmref5340o.cloudfront.net

So, d now points to my new CloudFront Distribution, backed by my S3 bucket called my-origin. Boto makes it easy to add content objects to my new Distribution. For example, let's assume that I have a JPEG image on my local computer that I want to place in my new Distribution:


>>> fp = open('/home/mitch/mycoolimage.jpg')
>>> obj = d.add_object('mycoolimage.jpg', fp)
>>>

Not only does the add_object method copy the content to the correct S3 bucket, it also makes sure the S3 ACL is set correctly for the type of Distribution. In this case, since it is a public Distribution the content object will be publicly readable.

You can also list all objects currently in the Distribution (or rather it's underlying bucket) by calling the get_objects method and you can also get the CloudFront URL for any object by using it's url method:


>>> d.get_objects()
[] >>> obj.url() http://d33unmref5340o.cloudfront.net/mycoolimage.jpg 

Don't Cross the Streams

The recently announced streaming feature of CloudFront will be of interest to anyone that needs to server audio or video. The nice thing about streaming is that only the content that the user actually watches or listens to is downloaded so if you have users with short attention spans, you can potentially save a lot of bandwidth costs. Plus, the streaming protocols support the ability to serve different quality media based on the user's available bandwidth.

To take advantage of these cool features, all you have to do is store streamable media files (e.g. FLV, MP3, MP4) in your origin bucket and then CloudFront will make those files available via RTMP, RTMPT, RTMPE or RTMPTE protocol using Adobe's Flash Media Server (see the CloudFront Developer's Guide for details).

The process for creating a new Streaming Distribution is almost identical to the above process.


>>> sd = c.create_streaming_distribution('my-origin.s3.amazonaws.com', True, 'My Streaming Distribution')
>>> fp = open('/home/mitch/embarrassingvideo.flv')
>>> strmobj = sd.add_object('embarrassingvideo.flv', fp)
>>> strmobj.url()
u'rtmp://sj6oeasqgt12x.cloudfront.net/cfx/st/embarrassingvideo.flv'

Note that the url method still returns the correct URL to embed in your media player to access the streaming content.

My Own Private Idaho

Another new feature in CloudFront is the ability to distribute private content across the CloudFront content delivery network. This is really a two-part process:

  • Secure the content in S3 so only you and CloudFront have access to it
  • Create signed URL's pointing to the secure content that can be distributed to whoever you want to be able to access the content

I'm only going to cover the first part of the process here. The CloudFront Developer's Guide provides detailed instructions for creating the signed URL's. Eventually, I'd like to be able to create the signed URL's directly in boto but doing so requires some non-standard Python libraries to handle the RSA-SHA1 signing and that is something I try to avoid in boto.

Let's say that we want to take the public Distribution I created above and turn it into a private Distribution. The first thing we need to do is create an Origin Access Identity (OAI). The OAI is a kind of virtual AWS account. By granting the OAI (and only the OAI) read access to your private content it allows you to keep the content private but allow the CloudFront service to access it.

Let's create a new Origin Access Identity and associate it with our Distribution:


>>> oai = c.create_origin_access_identity('my_oai', 'An OAI for testing')
>>> d.update(origin_access_identity=oai)

If there is an Origin Access Identity associated with a Distribution then the add_object method will ensure that the ACL for any objects added to the distribution is set so that the OAI has READ access to the object. In addition, by default it will also configure the ACL so that all other grants are removed so only the owner and the OAI have access. You can override this behavior by passing replace=False to the add_object call.

Finally, boto makes it easy to add trusted signers to your private Distribution. A trusted signer is another AWS account that has been authorized to create signed URL's for your private Distribution. To enable another AWS account, you need that accounts AWS Account ID (see this for an explanation about the Account ID).


>>> from boto.cloudfront.signers import TrustedSigners
>>> ts = TrustedSigners()
>>> ts.append('084307701560')
>>> d.update(trusted_signers=ts)

As I said earlier, I'm not going to go into the process of actually creating the signed URL's in this blog post. The CloudFront docs do a good job of explaining this and until I come up with a way to support the signing process in boto, I don't really have anything to add.

Thursday, December 10, 2009

Comprehensive List of AWS Endpoints

Note: AWS has now started their own list of API endpoints here. You may want to begin using that list as the definitive reference.


Another Note:  I am now collecting and publishing this information as JSON data. I am generating the HTML below from this JSON data.


Guy Rosen (@guyro on Twitter) recently asked about a comprehensive list of AWS service endpoints.  This information is notoriously difficult to find and seems to be spread across many different documents, release notes, etc.  Fortunately, I had most of this information already gathered together in the boto source code so I pulled that together and hunted down the stragglers and put this list together.

If you have any more information to provide or have corrections, etc. please comment below.  I'll try to keep this up to date over time.

Auto Scaling
  • us-east-1: autoscaling.us-east-1.amazonaws.com
  • us-west-1: autoscaling.us-west-1.amazonaws.com
  • us-west-2: autoscaling.us-west-2.amazonaws.com
  • sa-east-1: autoscaling.sa-east-1.amazonaws.com
  • eu-west-1: autoscaling.eu-west-1.amazonaws.com
  • ap-southeast-1: autoscaling.ap-southeast-1.amazonaws.com
  • ap-southeast-2: autoscaling.ap-southeast-2.amazonaws.com
  • ap-northeast-1: autoscaling.ap-northeast-1.amazonaws.com
CloudFormation
  • us-east-1: cloudformation.us-east-1.amazonaws.com
  • us-west-1: cloudformation.us-west-1.amazonaws.com
  • us-west-2: cloudformation.us-west-2.amazonaws.com
  • sa-east-1: cloudformation.sa-east-1.amazonaws.com
  • eu-west-1: cloudformation.eu-west-1.amazonaws.com
  • ap-southeast-1: cloudformation.ap-southeast-1.amazonaws.com
  • ap-southeast-2: cloudformation.ap-southeast-2.amazonaws.com
  • ap-northeast-1: cloudformation.ap-northeast-1.amazonaws.com
CloudFront
  • universal: cloudfront.amazonaws.com
CloudSearch
  • us-east-1: cloudsearch.us-east-1.amazonaws.com
CloudWatch
  • us-east-1: monitoring.us-east-1.amazonaws.com
  • us-west-1: monitoring.us-west-1.amazonaws.com
  • us-west-2: monitoring.us-west-2.amazonaws.com
  • sa-east-1: monitoring.sa-east-1.amazonaws.com
  • eu-west-1: monitoring.eu-west-1.amazonaws.com
  • ap-southeast-1: monitoring.ap-southeast-1.amazonaws.com
  • ap-southeast-2: monitoring.ap-southeast-2.amazonaws.com
  • ap-northeast-1: monitoring.ap-northeast-1.amazonaws.com
DevPay
  • universal: ls.amazonaws.com
DynamoDB
  • us-east-1: dynamodb.us-east-1.amazonaws.com
  • us-west-1: dynamodb.us-west-1.amazonaws.com
  • us-west-2: dynamodb.us-west-2.amazonaws.com
  • ap-northeast-1: dynamodb.ap-northeast-1.amazonaws.com
  • ap-southeast-1: dynamodb.ap-southeast-1.amazonaws.com
  • ap-southeast-2: dynamodb.ap-southeast-2.amazonaws.com
  • eu-west-1: dynamodb.eu-west-1.amazonaws.com
ElastiCache
  • us-east-1: elasticache.us-east-1.amazonaws.com
  • us-west-1: elasticache.us-west-1.amazonaws.com
  • us-west-2: elasticache.us-west-2.amazonaws.com
  • sa-east-1: elasticache.sa-east-1.amazonaws.com
  • eu-west-1: elasticache.eu-west-1.amazonaws.com
  • ap-southeast-1: elasticache.ap-southeast-1.amazonaws.com
  • ap-northeast-1: elasticache.ap-northeast-1.amazonaws.com
Elastic Beanstalk
  • us-east-1: elasticbeanstalk.us-east-1.amazonaws.com
  • us-west-1: elasticbeanstalk.us-west-1.amazonaws.com
  • us-west-2: elasticbeanstalk.us-west-2.amazonaws.com
  • ap-northeast-1: elasticbeanstalk.ap-northeast-1.amazonaws.com
  • ap-southeast-1: elasticbeanstalk.ap-southeast-1.amazonaws.com
  • ap-southeast-2: elasticbeanstalk.ap-southeast-2.amazonaws.com
  • eu-west-1: elasticbeanstalk.eu-west-1.amazonaws.com
Elastic Compute Cloud
  • us-east-1: ec2.us-east-1.amazonaws.com
  • us-west-1: ec2.us-west-1.amazonaws.com
  • us-west-2: ec2.us-west-2.amazonaws.com
  • sa-east-1: ec2.sa-east-1.amazonaws.com
  • eu-west-1: ec2.eu-west-1.amazonaws.com
  • ap-southeast-1: ec2.ap-southeast-1.amazonaws.com
  • ap-southeast-2: ec2.ap-southeast-2.amazonaws.com
  • ap-northeast-1: ec2.ap-northeast-1.amazonaws.com
Elastic Load Balancing
  • us-east-1: elasticloadbalancing.us-east-1.amazonaws.com
  • us-west-1: elasticloadbalancing.us-west-1.amazonaws.com
  • us-west-2: elasticloadbalancing.us-west-2.amazonaws.com
  • sa-east-1: elasticloadbalancing.sa-east-1.amazonaws.com
  • eu-west-1: elasticloadbalancing.eu-west-1.amazonaws.com
  • ap-southeast-1: elasticloadbalancing.ap-southeast-1.amazonaws.com
  • ap-southeast-2: elasticloadbalancing.ap-southeast-2.amazonaws.com
  • ap-northeast-1: elasticloadbalancing.ap-northeast-1.amazonaws.com
Elastic Map Reduce
  • us-east-1: elasticmapreduce.us-east-1.amazonaws.com
  • us-west-1: elasticmapreduce.us-west-1.amazonaws.com
  • us-west-2: elasticmapreduce.us-west-2.amazonaws.com
  • sa-east-1: elasticmapreduce.sa-east-1.amazonaws.com
  • eu-west-1: elasticmapreduce.eu-west-1.amazonaws.com
  • ap-southeast-1: elasticmapreduce.ap-southeast-1.amazonaws.com
  • ap-southeast-2: elasticmapreduce.ap-southeast-2.amazonaws.com
  • ap-northeast-1: elasticmapreduce.ap-northeast-1.amazonaws.com
Flexible Payment Service
  • sandbox: authorize.payments-sandbox.amazon.com/cobranded-ui/actions/start
  • production: authorize.payments.amazon.com/cobranded-ui/actions/start
  • sandbox: fps.sandbox.amazonaws.com
  • production: fps.amazonaws.com
Glacier
  • us-east-1: glacier.us-east-1.amazonaws.com
  • us-west-1: glacier.us-west-1.amazonaws.com
  • us-west-2: glacier.us-west-2.amazonaws.com
  • eu-west-1: glacier.eu-west-1.amazonaws.com
  • ap-northeast-1: glacier.ap-northeast-1.amazonaws.com
Identity & Access Management
  • universal: iam.amazonaws.com
Import/Export
  • universal: importexport.amazonaws.com
Mechanical Turk
  • universal: mechanicalturk.amazonaws.com
Relational Data Service
  • us-east-1: rds.us-east-1.amazonaws.com
  • us-west-1: rds.us-west-1.amazonaws.com
  • us-west-2: rds.us-west-2.amazonaws.com
  • sa-east-1: rds.sa-east-1.amazonaws.com
  • eu-west-1: rds.eu-west-1.amazonaws.com
  • ap-southeast-1: rds.ap-southeast-1.amazonaws.com
  • ap-southeast-2: rds.ap-southeast-2.amazonaws.com
  • ap-northeast-1: rds.ap-northeast-1.amazonaws.com
Route 53
  • universal: route53.amazonaws.com
Security Token Service
  • universal: sts.amazonaws.com
Simple Email Service
  • us-east-1: email.us-east-1.amazonaws.com
Simple Notification Service
  • us-east-1: sns.us-east-1.amazonaws.com
  • us-west-1: sns.us-west-1.amazonaws.com
  • us-west-2: sns.us-west-2.amazonaws.com
  • sa-east-1: sns.sa-east-1.amazonaws.com
  • eu-west-1: sns.eu-west-1.amazonaws.com
  • ap-southeast-1: sns.ap-southeast-1.amazonaws.com
  • ap-southeast-2: sns.ap-southeast-2.amazonaws.com
  • ap-northeast-1: sns.ap-northeast-1.amazonaws.com
Simple Queue Service
  • us-east-1: sqs.us-east-1.amazonaws.com
  • us-west-1: sqs.us-west-1.amazonaws.com
  • us-west-2: sqs.us-west-2.amazonaws.com
  • sa-east-1: sqs.sa-east-1.amazonaws.com
  • eu-west-1: sqs.eu-west-1.amazonaws.com
  • ap-southeast-1: sqs.ap-southeast-1.amazonaws.com
  • ap-southeast-2: sqs.ap-southeast-2.amazonaws.com
  • ap-northeast-1: sqs.ap-northeast-1.amazonaws.com
Simple Storage Service
  • : s3.amazonaws.com
  • us-west-1: s3-us-west-1.amazonaws.com
  • us-west-2: s3-us-west-2.amazonaws.com
  • sa-east-1: s3.sa-east-1.amazonaws.com
  • eu-west-1: s3-eu-west-1.amazonaws.com
  • ap-southeast-1: s3-ap-southeast-1.amazonaws.com
  • ap-southeast-2: s3-ap-southeast-2.amazonaws.com
  • ap-northeast-1: s3-ap-northeast-1.amazonaws.com
Simple Worflow
  • us-east-1: swf.us-east-1.amazonaws.com
SimpleDB
  • us-east-1: sdb.amazonaws.com
  • us-west-1: sdb.us-west-1.amazonaws.com
  • us-west-2: sdb.us-west-2.amazonaws.com
  • sa-east-1: sdb.sa-east-1.amazonaws.com
  • eu-west-1: sdb.eu-west-1.amazonaws.com
  • ap-southeast-1: sdb.ap-southeast-1.amazonaws.com
  • ap-southeast-2: sdb.ap-southeast-2.amazonaws.com
  • ap-northeast-1: sdb.ap-northeast-1.amazonaws.com
Storage Gateway
  • us-east-1: storagegateway.us-east-1.amazonaws.com
  • us-west-1: storagegateway.us-west-1.amazonaws.com
  • us-west-2: storagegateway.us-west-2.amazonaws.com
  • sa-east-1: storagegateway.sa-east-1.amazonaws.com
  • eu-west-1: storagegateway.eu-west-1.amazonaws.com
  • ap-southeast-1: storagegateway.ap-southeast-1.amazonaws.com
  • ap-southeast-2: storagegateway.ap-southeast-2.amazonaws.com
  • ap-northeast-1: storagegateway.ap-northeast-1.amazonaws.com
Virtual Private Cloud
  • us-east-1: ec2.us-east-1.amazonaws.com
  • us-west-1: ec2.us-west-1.amazonaws.com
  • us-west-2: ec2.us-west-2.amazonaws.com
  • sa-east-1: vpc.sa-east-1.amazonaws.com
  • eu-west-1: ec2.eu-west-1.amazonaws.com
  • ap-southeast-1: ec2.ap-southeast-1.amazonaws.com
  • ap-southeast-2: ec2.ap-southeast-2.amazonaws.com
  • ap-northeast-1: ec2.ap-northeast-1.amazonaws.com

Friday, December 4, 2009

Creating an EBS-backed AMI from an S3-backed AMI

The recent introduction of Boot From EBS for EC2 opens up a lot of new possibilities.  But there are some bootstrapping issues to deal with.  There aren't many EBS-backed AMI's available yet and, given the rather complex process involved in porting them, it may take a while for them to show up.  This article will walk through the process of converting a popular S3-based AMI to an EBS-backed AMI.  I don't guarantee that this is the best process and I certainly wouldn't recommend that anyone use the resulting EBS-backed AMI for anything other than testing and further development, but it puts a stake in the ground regarding a potential process.  I'm sure I will hear about the shortcomings and possible improvements!

As a starting point, I'm going to use one of Eric Hammond's excellent Ubuntu AMI's.  In particular, I'm going to use:

ami-eef61587 alestic-64/ubuntu-9.04-jaunty-base-64-20091011.manifest.xml

This same basic process should work for other Linux-based AMI's.  The first thing I need to do is fire up an new instance of this AMI.  In addition, I'm going to create a new 10GB EBS volume that will serve as the prototype for my EBS-based AMI.  Here's how I do that using boto:

>>> import boto
>>> c = boto.connect_ec2()
>>> c.get_all_images(['ami-eef61587'])
[Image:ami-eef61587]
>>> img = _[0]
>>> img.run(key_name='cloudright', security_groups=['test1'], instance_type='m1.large')
Reservation:r-0369c96b
>>> inst = _.instances[0]
>>> inst.update()
u'pending'
>>> inst.update()
u'running'
>>> inst.placement
u'us-east-1b'
>>> v = c.create_volume(10, inst.placement)
>>> v.attach(inst.id, '/dev/sdh')
u'attaching'
>>> inst.public_dns_name
u'ec2-67-202-30-28.compute-1.amazonaws.com'

So, at this point I have a new EC2 instance up and running using the S3-based AMI and a new 10GB EBS volume attached to that instance.  Now, I need to login to that new instance and do a bit of work.

$ ssh -i ~/.ssh/cloudright root@ec2-67-202-30-28.compute-1.amazonaws.com
...
root@domU-12-31-39-02-31-51:~# apt-get update
...
root@domU-12-31-39-02-31-51:~# apt-get -y upgrade
...
root@domU-12-31-39-02-31-51:~# apt-get -y install cpipe
...
root@domU-12-31-39-02-31-51:~# mkfs -t ext3 /dev/sdh
mke2fs 1.41.4 (27-Jan-2009)
/dev/sdh is entire device, not just one partition!
Proceed anyway? (y,n) y
...
root@domU-12-31-39-02-31-51:~# mkdir /ebs
root@domU-12-31-39-02-31-51:~# mount -t ext3 /dev/sdh /ebs
root@domU-12-31-39-02-31-51:~# tar cpS / | cpipe -vt -b 1024 | gzip -c | tar zxpS -C /ebs
....
root@domU-12-31-39-02-31-51:~# umount /ebs

So, basically I have ssh'ed into the new instance, run apt-get update and apt-get upgrade to install all of the latest patches, formatted the EBS volume as an EXT3 filesystem, mounted that filesystem as /ebs and then copied the entire contents of the current root volume over to the EBS volume.  Then I unmount the EBS volume.  Now, let's go back to my Python session running on my local machine.

>>> v.detach()
u'detaching'
>>> v.create_snapshot('Initial snapshot for EBS-backed 64-bit Ubuntu 9.04 AMI.')
Snapshot:snap-023ca66b
>>> from boto.ec2.blockdevicemapping import EBSBlockDeviceType, BlockDeviceMapping
>>> ebs = EBSBlockDeviceType()
>>> ebs.snapshot_id = 'snap-023ca66b'
>>> block_map = BlockDeviceMapping()
>>> block_map['/dev/sda1'] = ebs
>>> c.register_image('MG-Ubuntu-9.04-EBS-20091204', 'Testing the creation of EBS-backed Ubuntu AMI.',
architecture='x86_64', kernel_id=img.kernel_id,
ramdisk_id=img.ramdisk_id,
root_device_name='/dev/sda1', block_device_map=block_map)
u'ami-f002e099'

So, here we are detaching the EBS volume and then creating a snapshot of that volume.  Then, we need to import some data structures that will allow us to register a new EBS-based image.  The first data structure is the EBSBlockDeviceType.  There are a number of available fields in that object but the only one we need to worry about is the snapshot_id.  This tells EC2 that when someone wants to start up a new instance of our AMI, EC2 needs to start by creating a new EBS volume from this snapshot.  The second data structure is the BlockDeviceMapping.  It is actually a subclass of a Python dictionary and behaves as you would expect.  We need to add an entry that maps the device name of our root volume (in this case /dev/sda1) to the EBS snapshot.  Finally, we call register_image to create the new AMI.  We pass in a name, a description, the architecture, the kernel and ramdisk (we are just referring to the same ones used by the original S3-backed AMI), the name of our root device (/dev/sda1) and the block device mapping we just created.  EC2 returns with a new AMI id and we can then use that to start new EC2 instances.  Just to verify, let's start up a new instance based on our EBS-backed AMI:

>>> c.run_instances('ami-f002e099', key_name='cloudright', security_groups=['test1'], instance_type='m1.large')
Reservation:r-f175d599
>>> inst2 = _.instances[0]
>>> inst2.update()
u'pending'
>>> inst2.update()
u'running'
>>> inst2.public_dns_name
u'ec2-75-101-218-5.compute-1.amazonaws.com'

Now let's SSH into our new EBS-based instance and make sure everything is okay.

jobs:~ mitch$ ssh -i ~/.ssh/cloudright.pem root@ec2-75-101-218-5.compute-1.amazonaws.com
...
root@domU-12-31-39-06-E1-62:~# df
Filesystem           1K-blocks      Used Available Use% Mounted on
/dev/sda1             10321208    837672   8959248   9% /
tmpfs                  3935948         0   3935948   0% /lib/init/rw
varrun                 3935948        40   3935908   1% /var/run
varlock                3935948         0   3935948   0% /var/lock
udev                   3935948        72   3935876   1% /dev
tmpfs                  3935948         0   3935948   0% /dev/shm
root@domU-12-31-39-06-E1-62:~# 


I have made this AMI public and available in the us-east-1 region.  Feel free to fire it up and play around with it but be aware that none of the careful testing that accompanies Eric's or Canonical's AMI releases has happened here so it is for illustrative purposes only.

Tuesday, December 1, 2009

API Maturity in Cloud Services


I think one point people often overlook when discussing common cloud API's is the overall maturity of API's for different types of cloud services.  Trying to achieve commonality on API's that have not yet reached maturity can be a frustrating and time-consuming effort.  So, how stable are the API's for common cloud computing services?  This article focuses on a couple of different measures of API maturity to try to answer that question.

API Churn

One measure of API maturity is churn.  In other words, how much is the API changing.  Mature API's should show relatively small amounts of churn while immature, evolving API's will show increased levels of churn.  The chart below shows one measurement of churn, namely the growth in the API.  For HTTP-based API's, this can easily be measured by the number of different types of requests supported by the API.


This chart is showing us the number of API requests supported by each of the services at launch compared to the number of API requests currently supported by the services.  The EC2 API has grown from 14 requests at launch (08/24/2006) compared to 71 requests today.  This includes requests for the CloudWatch, AutoScaling and Elastic Load Balancing services which are essentially part of EC2.  Even if you exclude those services, though, the total is now 47 API requests for EC2 today, a 3X growth.  In comparison, S3 went from 8 API requests to 13 and SQS actually reduced their API requests from 12 to 11.

During this same time period, EC2 has published 17 API version while SQS has published only 4 and S3 is still running the same API version published at launch, even though some new capabilities have been added.

API Consistency

Another way to measure maturity is to compare similar API's offered by different vendors.  Mature API's should show a great deal of similarity among the different API's while immature API's will tend to show many differences.  The reasoning behind this is that a mature API should be based on a well-defined set of abstractions and therefore the type and number of API calls dealing with those abstractions should be similar across vendors.  In an immature API, the abstractions have not yet been fully fleshed out and you will see more variation among similar API's from different vendors.

First, let's compare Amazon's Simple Queue Service with Microsoft's Azure Queue Service:


This graph is comparing the number of API requests that are common between the different vendors (shown in blue) versus the number of API requests that are unique in a particular vendor's API (shown in red).  An API request is considered common if both API's have similar requests with similar actions and side effects.  Large blue bars and small red bars indicate more consistent API's whereas large red bars and small blue bars indicate less inconsistent API's.  The graph shows a fairly high degree of consistency between the two different queue service API's.

Now let's compare Amazon's Simple Storage Service with Rackspace's CloudFiles and Microsoft's Azure Blob Service:


Again, we see a fairly high degree of consistency across all three API's.  The major difference is related to the Azure Blob service's handling of large Blob's.  It places a limit of 64 MB on individual pages within a Blob and allows multiple pages to be associated with a particular page.  The other services have no equivalent abstraction, hence the differences.

Now let's compare Amazon's EC2 service with Rackspace's CloudServers:


Here we see the opposite of the graphs for the queue and storage services.  The large red bars indicate a large number of API requests that are unique to a particular vendor's API and a relatively small number of API requests that are common across both vendors.  In fact, aside from the basic operations of listing instances, starting/stopping instances, and listing/creating and deleting available images, it was difficult to even compare the two API's.  The handling of IP addresses, networking, firewalls, security credentials, block storage, etc. were unique to each vendor.

So, does that mean that common cloud API's are impossible?  Of course not.  However, I do believe that achieving meaningful levels of functionality across multiple vendors API's (especially around servers) is building on a shifting and incomplete set of abstractions at this point.  Solidifying those abstractions is key to achieving useful interoperability.

Friday, October 30, 2009

Using RDS in Boto

Initial support for RDS has just been added to boto.  The code currently lives in the subversion trunk but a new boto release will be out very soon that will also include the new RDS module.  To get things started, I'll give a short tutorial on using RDS.

The first thing we need to do is create a connection to the RDS service.  This is done in the same way all other service connections are created in boto:


>>> import boto
>>> rds = boto.connect_rds()

Ultimately, we want to create a new DBInstance, basically an EC2 instance that has been pre-configured to run MySQL.  Before we can do that, we need to create a couple of things that are required when creating a new DBInstance.  First, we will need a DBSecurityGroup.  This is very similar to the SecurityGroup used in EC2 but it's considerably more simple because it is focused on only one type of application, MySQL.  Within a DBSecurityGroup I can authorize access either by a CIDR block or by specifying an existing EC2 SecurityGroup.  Since I'm going to be accessing my DBInstance from an EC2 instance, I'm just going to authorize the EC2 SecurityGroup that my instance is running in.  Let's assume it's the group "default":


>>> sg = rds.create_dbsecurity_group('group1', 'My first DB Security group') 
>>> ec2 = boto.connect_ec2()
>>> my_ec2_group = ec2.get_all_security_groups(['default'])[0]
>>> sg.authorize(ec2_group=my_ec2_group)

 Now that we have a DBSecurityGroup created, we now need a DBParameterGroup.  The DBParameterGroup is what's used to manage all of the configuration settings you would normally have in your MySQL config file.  Because you don't have direct access to your DBInstance (unlike a normal EC2 instance) you need to use the DBParameterGroup to retrieve and modify the configuration settings for your DBInstance.  Let's create a new one:


>>>pg = rds.create_parameter_group('paramgrp1', description='My first param group.')

 The ParameterGroup object in boto subclasses dict, so it behaves just like a normal mapping type.  Each key in the ParameterGroup is the name of a config entry and it's value is a Parameter object.  Let's explore one of the Parameters in the ParameterGroup.  Because the set of parameters is quite large, RDS doesn't send all of the default parameter settings to you when you create a new ParameterGroup.  To fetch them from RDS, we need to call get_params:


>>> pg.get_params()
>>> pg.keys()
[u'default_week_format',
 u'lc_time_names',
 u'innodb_autoinc_lock_mode',
 u'collation_server',
<...>
  u'key_buffer_size',
 u'key_cache_block_size',
 u'log-bin']
>>> param = pg['max_allowed_packet']
>>> param.name
u'max_allowed_packet'
>>> param.type
u'integer'
>>> param.allowed_values
u'1024-1073741824'
>>> param.value = -5
---------------------------------------------------------------------------
ValueError                                Traceback (most recent call last)

ValueError: range is 1024-1073741824
>>> param.value = 2048
>>> param.apply()

Because the Parameters have information about the type of the data and allowable ranges, we can do a pretty good job of validating values before sending them back to RDS with the apply method.

Now that we have a DBSecurityGroup and DBParameterGroup created, we can create our DBInstance.


>>> inst = rds.create_dbinstance(id='dbinst1', allocated_storage=10,
instance_class='db.m1.small', master_username='mitch',
master_password='topsecret', param_group='paramgrp1',
security_group='group1')

At this point, RDS will start the process of bringing up a new MySQL instance based on my specifications.  There are lots of other parameters available to tweak.  In addition, you can do things like set the preferred maintenance window and when you would prefer to have snapshots run.  To check on the status of our instance, we can do the following:


>>> rs = rds.get_all_dbinstances()
>>> rs
[DBInstance:dbinst1]
>>> inst = rs[0]
>>> inst.status
>>> u'available'
>>> inst.endpoint
>>> (u'dbinst1.c07mrl4pthxk.us-east-1.rds.amazonaws.com', 3306)

So, at this point our new DBInstance is up and running and we have the endpoint and port number we need to connect to it.  One of the nice things about RDS is that once the instance is running, I can use RDS to perform a lot of the management tasks associated with the server.  I can do snapshots of the server at any time, or I can automate that process.  I can change any of the parameters associated with the server and decide whether I want those changes to take place immediately or to wait until the next maintenance window.  I can also use the modify_dbinstance method to tell RDS to increase the allocated storage on my server or even move my instance up to a larger instance class.

The current RDS code is checked in.  It's still beta quality but we will be releasing a 1.9 version of boto early next week which will include this code as well as support for VPC and a ton of bug fixes.  So, if you get a chance, give the boto RDS module a try and let us know what you think.

Tuesday, October 27, 2009

RDS: The End of SimpleDB?

The recent announcement of Amazon's Relational Database Service is generating a lot of buzz.  And well it should.  For people who require a relational database for their applications and have been rolling their own with EC2 and EBS, it offers a really nice option.  Let AWS manage that database for you and focus more attention on your app.  It also represents another inevitable step up the ladder from IaaS to PaaS for AWS and gives pretty good triangulation data about where cloud computing will be in a few years.

But does RDS also mean the end of SimpleDB?  There have already been posts on the SimpleDB forum to that affect.  I think the answer is "no" but it does illustrate what I think has been a misstep in the evolution of SimpleDB.

Let me start by saying that I love SimpleDB.  I use it all the time.  I have built a number of real applications and services with it and in my experience it "just works".  I know there are some applications that just require a full-blown relational database but in my experience I've been able to do everything I need to do with SimpleDB.  And I absolutely love the fact that it's just there as a service, doing whatever it needs to do to scale along with my app.

But it seems like SimpleDB has always been a bit of a red-headed stepchild at AWS.  They haven't had a clear, consistent strategy for it.  When people compared it to a relational database, rather than following the NoSQL philosophy they tried to make SimpleDB look more like a relational database.  They deprecated it's elegant set-based query language with a SQL subset in hopes of attracting the relational crowd.  But I think mainly what happens is that people focus on the "subset" aspect and are always pining for yet more SQL compatibility.  I just don't think it won them many converts.

So, does RDS represent the end of SimpleDB?  I really don't think so.  The two offerings are very, very different.  AWS needs to embrace that difference and communicate it more clearly.  There are a lot of applications out there that can benefit from the lightweight, super-scalable, and easy to use qualities of SimpleDB.  MySQL simply can't compete on those dimensions.  I'm pretty sure AWS agrees but it would be nice to see some positive reinforcement from them soon, before their user base get's scared.  I don't think that building RDS on the back of SimpleDB is what AWS had in mind.

Thursday, October 1, 2009

Managing Your AWS Credentials (Part 3)

The first part of this series described the various AWS credentials and the second part focused on some of the challenges in keeping those credentials secret. In this short update, I want to talk about a new feature available in AWS that will help you keep your credentials more secure.

The new Multi Factor Authentication (MFA) provides an additional layer of protection around access to your AWS Console and AWS Portal. As you recall from Part 1, controlling access to these areas is vitally important because they in turn allow access to all of your other AWS resources and credentials.

To use MFA, you need to sign up for the service and buy an inexpensive security device such as the one shown below:


Once you have the device and are registered for MFA, when you attempt to log in to your AWS Portal or AWS Console, you will be asked for the email address associated with the account, the (hopefully very strong) password associated with the account and then finally you will be asked to enter the 6-digit number that appears on your device when you press the little grey button.

That means that even if someone discovers your password, they still need the device before they can log in. And, even if they have the device, they still need your password. Hence the name, Multi-Factor. The devices are inexpensive and the additional security they provide for your AWS credentials is well worth the cost. I highly recommend MFA. At least for your production credentials.

Another useful new security capability is Key Rotation. This is automatically enabled for all AWS accounts and allows you to create a new AccessKeyID and SecretAccessKey but allow the old ones to remain active. In that way, you can create new keys and then begin transitioning your servers to use the new credentials and when the transition is complete, you can then disable the old credentials. That's handy anytime you think you may have been compromised but its also a good idea to do it as part of a regular security routine.

Wednesday, September 30, 2009

Stupid Boto Tricks #1 - Cross-Region Scripting

Years ago, when I was working on DocuShare at Xerox, I used to set aside an hour or two once a week and, in the tradition of David Letterman's Stupid Pet Tricks, I used to come up with a Stupid DocuShare Trick and email it around to colleagues. The rules were simple.
  • The trick couldn't take more than an hour to actually implement
  • The trick had to demonstrate some unexpected capability of the system
  • The trick had to at least point in the direction of some actually useful capability, even though the trick in it's current form may not have been tremendously useful
It was actually quite fun and a couple of the tricks eventually evolved into truly useful features. So, I thought I would start something similar with boto.

The inspiration behind this Stupid Boto Trick was a thread on the SimpleDB forum. A user asked whether it was possible to get a listing of all SimpleDB domains across all AWS regions. The answer is "no" or at least "no, not directly". Each region has it's own set of service endpoints and you have to connect to a specific endpoint to issue requests. So, you would have to ask each SimpleDB endpoint for a list of domains and then combine the two lists on the client side.

To address this, I created a new Python class called a ServiceSet. A ServiceSet represents all of the endpoints for a particular Service and, when you access a particular attribute or method on the ServerSet, it actually performs the action on each of the endpoints of the service and then assembles the results for you. Here's the quick, dirty, undocumented code. Hey, like I said, I only get an hour at the most!

class ServiceSet(list):

def __init__(self, service, **kwargs):
self.service = service
self.regions = None
if self.service == 'ec2':
import boto.ec2
self.regions = boto.ec2.regions(**kwargs)
elif self.service == 'sdb':
import boto.sdb
self.regions = boto.sdb.regions(**kwargs)
elif self.service == 'sqs':
import boto.sqs
self.regions = boto.sqs.regions(**kwargs)
for region in self.regions:
self.append(region.connect(**kwargs))

def __getattr__(self, name):
results = []
is_callable = False
for conn in self:
try:
val = getattr(conn, name)
if callable(val):
is_callable = True
results.append(val)
except:
results.append(None)
if is_callable:
self.map_list = results
return self.map
return results

def map(self, *args):
results = []
for fn in self.map_list:
results.append(fn(*args))
return results

This implementation of the ServiceSet understands EC2, SQS and SimpleDB. S3 handles it's regions differently than the other services so we will leave that one out for now. Let's take it for a little spin around the block. First, let's create a ServerSet for SimpleDB:

>>> from serverset import ServerSet
>>> s = ServerSet('sdb')
>>> s
[SDBConnection:sdb.amazonaws.com, SDBConnection:sdb.eu-west-1.amazonaws.com]
>>>
So, we now have a ServerSet called s that contains connections to both endpoints for the SimpleDB service. Let's get a list of all of our domains, across both regions:

>>> s.get_all_domains()
[[Domain:foo,
Domain:test1248881005],
[Domain:bar]]
>>>
The results are returned as a list of lists although a slight modification to the ServerSet code would allow for a concatenated set. The nice thing is that the Domain objects within each of the lists knows about it's SDBConnection and will therefore always route Domain-specific methods to the right endpoint.

In addition to listing domains, you can also do other things. In fact, any method available on an SDBConnection object can also be invoked on the ServerSet which will, in turn, invoke the appropriate method on each of it's connections. Here's a transcript showing a bit of playing around with the ServerSet object:

>>> s.create_domain('serverset')
[Domain:serverset, Domain:serverset]
>>> s.put_attributes('serverset', 'testitem', {'foo' : 'bar', 'fie' : 'baz'})
[True, True]
>>> s.select('serverset', 'select * from serverset')
[[{u'fie': u'baz', u'foo': u'bar'}], [{u'fie': u'baz', u'foo': u'bar'}]]
>>> s.delete_domain('serverset')
[True, True]

So, there we have it. The first Stupid Boto Trick. I've created a Mercurial repo on bitbucket.org just to collect these tricks. You can access it at http://bitbucket.org/mitch/stupidbototricks/. You also need to be running at least r1306 of boto.

Monday, September 28, 2009

The Complexities of Simple

Back in the early, halcyon days of Cloud Computing there was really only one game in town; Amazon Web Services. Whether by luck or cunning, Amazon got a big, hairy head start on everyone else and so if you wanted Cloud-based storage, queues or computation you used AWS and life was, well, simple.

But now that we clearly have a full-blown trend on our hands there are more choices. The good folks from Rackspace picked up on the whole Cloud-thing early on and have leveraged their expertise in more traditional colo and managed servers to bring some very compelling offerings to market. Google, after their initial knee-jerk reaction of trying to give everything away has decided that what they have might be worth paying for and is actually charging people. And Microsoft, always a late riser, has finally rubbed the sleep dirt out of their eyes and finished their second cup of coffee and is getting serious about this cloud stuff. It's clear that this is going to be a big market and there will be lots of competitors.

So, we have choices. Which is good. But it also makes things more complicated. Several efforts are now under way to bring simplicity back in the form of unifying API's or REST interfaces that promise a Rosetta stone-like ability to let your applications speak to all of the different services out there without having to learn all of those different dialects. Sounds good, right?

Well, it turns out that making things simple is far more complicated than most people realize. For one thing, the sheer number of things that need to be unified is still growing rapidly. Just over the past year or so, Amazon alone has introduced:
  • Static IP addresses (via EIP)
  • Persistent block storage (EBS)
  • Load balancing
  • Auto scaling
  • Monitoring
  • Virtual Private Clouds
And that's just one offering from one company. It's clear that we have not yet fully identified the complete taxonomy of Cloud Computing. Trying to identify a unifying abstraction layer on top of this rapidly shifting sand is an exercise in futility.

But even if we look at an area within this world that seems simpler and more mature, e.g. storage, the task of simplifying is actually still quite complex. As an exercise, let's compare two quite similar services; S3 from AWS and Cloud Files from Rackspace.

S3 has buckets and keys. Cloud Files has containers and objects. Both services support objects up to 5GB in size. So far, so good. S3, however, has a fairly robust ACL mechanism that allows you to grant certain permissions to certain users or groups. At the moment, Cloud Files does not support ACL's.

Even more interesting is that when you perform a GET on a container in Cloud Files, the response includes the content-type for each object within the container. However, when you perform a GET on a bucket in S3, the response does not contain the content-type of each key. You need to do a GET on the key itself to get this type of meta data.

So, if you are designing an API to unify these two similar services you will face some challenges and will probably end up with a least common denominator approach. As a user of the unifying API, you will also face challenges. Should I rely on the least common denominator capabilities or should I actually leverage the full capabilities of the underlying service? Should the API hide differences in implementations (e.g. the content-type mentioned above) even if it creates inefficiencies? Or should it expose those differences and let the developer decide? But if it does that, how is it really helping?

I understand the motivation behind most of the unification efforts. People are worried about lock-in. And there are precedents within the technology world where unifying API's have been genuinely useful, e.g. JDBC, LDAP, etc. The difference is, I think, timing. The underlying technologies were mature and lots of sorting out had already occurred in the industry. We are not yet at that point in this technology cycle and I think these unification efforts are premature and will prove largely ineffective.

Thursday, September 24, 2009

Support for Shared Snapshots added to boto

The AWS juggernaut continues. In the wee hours of the morning, a new Shared Snapshot feature was announced. This handy new feature allows you to share EBS snapshots in the same way you can share an AMI already. So, I can now give any other AWS user the permission to create a new EBS volume from one of my existing EBS snaphots. And, just as I can make one of my AMI's public (allowing anyone to launch it) I can also choose to make one of my EBS snapshots public, allowing any AWS user to create a volume from it.

Jeff Barr's blog entry described some use cases for this new capability and Shlomo Swidler provides quite a few more. Just the ability to share EBS volumes across dev/test/production makes this a killer feature for me but there are many, many more use cases. The first step, though, is to add support for the new features in boto and I'm pleased to announce that as of r1298 the latest subversion code does just that. I'll be packaging up a new release soon, but until then I encourage you to give the subversion HEAD a try.

Here are a few examples to get you started.

First, let's create a new snapshot of an existing EBS volume:


>>> import boto
>>> ec2 = c.connect_ec2()
>>> rs = ec2.get_all_volumes()
>>>


At this point, the variable rs is a list of all of my current EBS volumes. For this example, I'm just going to use the first volume in that list:


>>> vol = rs[0]
>>> snap = vol.create_snapshot('This is my test snapshot for the blog')
>>>


This first thing to notice here is that AWS has snuck in another nice feature. You can now provide a description for a snapshot. Very nice! That could definitely be handy in helping to organize and identify the snapshot you are looking for. Having created the snapshot, let's now share it with another AWS user:


>>> snap.share(user_ids=['963068290131'])
True
>>>


I could also share this with everyone:


>>> snap.share(groups=['all'])
True
>>>


I could also decide that I no longer want the snapshot shared with everyone and remove that permission:


>>> snap.unshare(groups=['all'])
True
>>>


And to find out what the current permissions are for a snapshot, I can do this:


>>> snap.get_permissions()
{'user_ids': [u'963068290131']}
>>>

That should be enough to get you started. The API documentation has been updated although a few more updates are needed. BTW, if you haven't checked out the online docs recently you should. Patrick Altman converted all of the existing docs over to use Sphinx and the results are very, very nice. Thanks, Patrick.

Friday, September 4, 2009

Looking for a few good Boto developers

Hi -

One of the main goals of the boto project is to support all Amazon services and to keep that support current as AWS releases new versions of the services. As the number of services grow, and the pace of development at AWS increases, that becomes a challenge: at some point I will simply be unable to keep up! To meet that challenge, I would like to solicit help from the boto community.

I'm interested in finding people who would be willing to take ownership of specific boto modules (e.g. S3, SQS, ELB, etc.). There are two possible scenarios:

  • You could take responsibility for an existing boto module. This would mean addressing issues in the module as well as improving the module. In particular, boto 2.0 will be a major upgrade and may involve significant, even incompatible, changes in existing modules. As the owner of a module, you would be responsible for proposing changes, responding to comments, building consensus and ultimately implementing the changes. In practice, I think that a prerequisite for taking ownership of a module would be that you are a heavy user of the module.
  • You could express interest in developing new boto modules. We have a strong relationship with AWS and are usually briefed on upcoming services prior to their public announcement. Participating in AWS private alphas and betas is a fun experience and gives you direct input into the services and API's. Participating in this way would require you to sign, and more importantly, to honor a very strict confidentiality agreement with AWS. We can help facilitate this process with AWS.

In addition to these two scenarios, I'm also interested in establish a community of core developers and contributors to boto. As I mentioned before, the 2.0 release will be a major release and everything is on the table. I have a lot of ideas involving refactoring of existing code and also support for services beyond AWS. I would love to get more feedback and more ideas from the community around this release.

If you are interested in getting more involved in boto, please contact me directly; mitch.garnaat at gmail dot com.

Thanks,

Mitch

Monday, August 31, 2009

Good Post on AWS Security

If you enjoyed Managing Your AWS Credentials (Parts 1 and 2), I recommend that you check out Shlomo Swidler's latest blog post. It builds on the foundational information in Parts 1 and 2 but then covers a lot of new ground and proposes some very workable approaches to managing credentials on EC2 instances. Very useful.

Yeah, I know I could have just tweeted this but sometimes it feels good to type more than 140 characters.

Sunday, June 28, 2009

Boto 1.8c Released

A new version of boto is available. Version 1.8c fixes a serious issue in the S3 module and two Unicode-related issues in the mturk module.

I recommend all boto users who were running 1.8a or 1.8b upgrade to 1.8c asap.

You can download the new release at http://boto.googlecode.com/

Mitch

Wednesday, June 24, 2009

Boto 1.8a Released

Version 1.8a of boto, the Python library for Amazon Web Services, has been released. This version includes:
  • Released support for CloudWatch, Elastic Load Balancer (ELB) and AutoScale services. Thanks to Reza Lotun for contributing the AutoScale service module!
  • Support for POST on SimpleDB BatchPutAttributes requests and EC2 RunInstances requests. Both of these requests allow more data than can fit in a GET request. Supporting POST for these requests eliminates the restrictions of GET. Thanks to Andrey Smirnov and Brett Taylor from AWS for providing details on the use of POST in Query API's.
  • A number of changes to further support the use of boto with Eucalyptus. Thanks to Neil Soman for his help and patience in remote debugging these changes.
  • Fixes for Issues 226, 232, 233, 234, 237, 239
  • Many other small fixes and improvements
The new version can be downloaded from the Google Code Project Site.

Thursday, June 18, 2009

Managing Your AWS Credentials (Part 2)

NOTE: This article was updated on June 12, 2012

A More Elegant Approach Emerges

The original article below discusses a number of approaches for getting your AWS credentials onto an EC2 instances.  They all work but they all have significant shortcomings.

AWS recently announced some new capabilities that provide a more elegant and more secure way to address this problem.  Using IAM Roles for EC2 Instances you can create new IAM entity called a Role. A Role is similar to a User in that you can assign policies that control access to EC2 services and resources.  However, unlike Users, a Role can only be used when the Role is "assumed" by an entity like an EC2 Instance.  This means you can create a Role, associate policies with it, and the associate that Role with an instance when it is launched and a temporary set of credentials will magically be made available in the instance metadata of the newly launched instance.  These temporary credentials have relatively short life spans (although they can be renewed automatically) and, since they are IAM entities, they can be easily revoked.

In addition, boto and other AWS SDK's, understand this mechanism and can automatically find the temporary credentials, use them for requests and handle the expiration.  Your application doesn't have to worry about it at all.  Neat!

The following code shows a simple example of using IAM Roles in boto.  In this example, the policy associated with the Role allows full access to a single S3 bucket but you can use the AWS Policy Generator to create a policy for your specific needs.


Once the instance is launched, you can immediately start using boto and it will find and use the credentials associated with the Role.  I think this is a huge improvement over all of the previous techniques and I recommend it.

Managing Your AWS Credentials (Part 1)

Anyone who has deployed a production system in the Amazon Web Services infrastructure has grappled with the challenge of securing the application. The majority of the issues you face in an AWS deployment are the same issues you would face in deploying your application in any other environment, e.g.:
  • Hardening your servers by making sure you have the latest security patches for your OS and all relevant applications
  • Making sure your servers are running only the services required by your application
  • Reviewing file and directory ownership and permissions to minimize access to critical system files as much as possible
  • Configuring SSH to use non-standard ports and accept only public key authentication
  • Configure firewall rules to limit access to the smallest number of ports and CIDR blocks possible
That certainly isn't a comprehensive list but you can find plenty of information on securing servers and fortunately, since the servers you are running in the EC2 environment are standard servers, all of that information can be applied directly to securing your instances in AWS.

In fact, some of the tools provided by AWS such as the distributed firewall in EC2 can actually make the process even more secure because everything can be controlled via API's. So, for example, you can shut down SSH traffic completely at the EC2 firewall and write scripts that automatically enable SSH access for your current IP and then shut that port down as soon as you have closed your SSH session with the instance.

This series of articles focuses on an aspect of security that is very specific to AWS: managing your AWS credentials. In this first installment, let's start by reviewing the various credentials associated with your AWS account because this can be confusing for new users (and sometimes even for old users!).

AWS Account Credentials
These are the credentials you use to log into the AWS web portal and the AWS Management Console. This consists of an email address and a password. Since these credentials control access to all of the other credentials discussed below, it is very important to choose a strong password for this account and to age the password aggressively. I recommend using a service like random.org to generate 10-12 character random strings (longer is even better). Securing access to the portal should be your primary security goal.
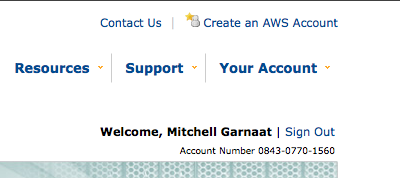
AWS Account Number
This is the unique 12-digit number associated with your AWS account. Unlike the other credentials we will discuss, this one is not a secret. The easiest way to find your account number is to look in the upper-right corner of the web page after you have logged into the AWS portal. You should see something like this:


The Account Number is a public identifier and is used mainly for sharing resources within AWS. For example, if I create a AMI in EC2 and I want to share that AMI with a specific user without making the AMI public, I would need to add that user's Account Number to the list of user id's associated with the AMI (see this for details). One source of confusion here is that even though the Account Number is displayed with hyphens separating the three groups of four digits, when used via the API the hyphens must be removed.

Once you are logged into the AWS portal, you will see a page titled "Access Identifiers". There are really two types of Access Identifiers.

AccessKeyID and SecretAccessKey
These Access Identifiers are at the heart of all API access in AWS. Virtually every REST or Query API request made to every AWS service requires you to pass your AccessKeyID as part of the request to identify who you are. Then, to prove that you really are who you say you are, the API's also require to you compute and include a Signature in the request.

The Signature is calculated by concatenating a number of elements of the request (e.g. timestamp, request name, parameters, etc.) into a StringToSign and then creating a Signature by computing an HMAC of the StringToSign using your SecretAccessKey as the key (see this for more details on request signing).

When the request is received by AWS, the service concatenates the same StringToSign and then computes the HMAC based on the SecretAccessKey AWS has associated with the AccessKeyID sent in the request. If they match, the request is authenticated. If not, it is rejected.

The AccessKeyID associated with an account cannot be changed but the SecretAccessKey can be regenerated at any time using the AWS portal. Because the SecretAccessKey is the shared secret upon which the entire authentication mechanism is based, if there is any risk that your SecretAccessKey has been compromised you should regenerate it. In fact, it would be a good practice to age your SecretAccessKey in the same way you do the password in your AWS credentials. Just remember that once you change the SecretAccessKey, any applications that are making API calls will cease to function until their associated credentials are updated.

X.509 Certificate
The other Access Identifier associated with your account is the X.509 Certificate. You can provide your own certificate or you can have AWS generate a certificate for you. This certificate can be used for authenticating requests when using the SOAP versions of the AWS API's and it is also used when creating your own AMI's in EC2. Essentially, the files that are created when bundling an AMI are cryptographically signed using the X.509 cert associated with your account so if anyone were to try to tamper with the bundled AMI, the signature would be broken and easily detected.

When using the SOAP API's, the X.509 certificate is as critically important from a security point of view as the SecretAccessKey discussed above and should be managed just as carefully. Remember, even if you don't use SOAP, a hacker could!

SSH Keys
The final credential we need to discuss is the public/private keypair used for SSH access to an EC2 instance. By default, an EC2 instance will allow SSH access only by PublicKey authentication. I strongly recommend that you stick to this policy in any AMI's that you create for your own use. SSH keypairs can be generated via the AWS Console and API. You should create keypairs for each individual in your organization that will need access to running instances and guard those SSH keys carefully.

In fact, what I recommend is storing all of these critical credentials in an encrypted form on a USB memory stick and only on that device (and a backup copy of it to be safe, of course). You can either use a device that incorporates the encryption natively (e.g. IronKey, etc.) or you can create an encrypted disk image and store that on the USB device. Alternatively, you could just store the encrypted disk image itself on your laptop but never store these critical credentials in the clear on any computer or memory stick and definitely do not email them around or exchange them via IM, etc.

In Part 2 of this series (coming tomorrow!), I'll discuss a strategy for managing these important credentials in a production environment. Stay tuned!

Thursday, May 21, 2009

Using EC2 CloudWatch in Boto

The new CloudWatch service from AWS provides some interesting ways to monitor EC2 instances and LoadBalancers. The code to support this new service has just been checked into the subversion repository for boto. It still needs some hardening before it will be incorporated into a new boto release but if you are interested in experimenting with CloudWatch, check out the latest boto code and let me know what you think. This post should provide just about enough to get you started.

The 5 Minute How-To Guide

First, make sure you have something to monitor. You can either create a LoadBalancer or enable monitoring on an existing EC2 instance. To enable monitoring on an existing instance, you can do something like this:

>>> import boto
>>> c = boto.connect_ec2()
>>> c.monitor_instance('i-12345678')


Where the "i-12345678" is the ID of your existing instance. It takes a while for the monitoring data to start accumulating but once it does, you can do this:

>>> import boto
>>> c = boto.connect_cloudwatch()
>>> metrics = c.list_metrics()
>>> metrics
[Metric:NetworkIn,
Metric:NetworkOut,
Metric:NetworkOut(InstanceType,m1.small),
Metric:NetworkIn(InstanceId,i-e573e68c),
Metric:CPUUtilization(InstanceId,i-e573e68c),
Metric:DiskWriteBytes(InstanceType,m1.small),
Metric:DiskWriteBytes(ImageId,ami-a1ffb63),
Metric:NetworkOut(ImageId,ami-a1ffb63),
Metric:DiskWriteOps(InstanceType,m1.small),
Metric:DiskReadBytes(InstanceType,m1.small),
Metric:DiskReadOps(ImageId,ami-a1ffb63),
Metric:CPUUtilization(InstanceType,m1.small),
Metric:NetworkIn(ImageId,ami-a1ffb63),
Metric:DiskReadOps(InstanceType,m1.small),
Metric:DiskReadBytes,
Metric:CPUUtilization,
Metric:DiskWriteBytes(InstanceId,i-e573e68c),
Metric:DiskWriteOps(InstanceId,i-e573e68c),
Metric:DiskWriteOps,
Metric:DiskReadOps,
Metric:CPUUtilization(ImageId,ami-a1ffb63),
Metric:DiskReadOps(InstanceId,i-e573e68c),
Metric:NetworkOut(InstanceId,i-e573e68c),
Metric:DiskReadBytes(ImageId,ami-a1ffb63),
Metric:DiskReadBytes(InstanceId,i-e573e68c),
Metric:DiskWriteBytes,
Metric:NetworkIn(InstanceType,m1.small),
Metric:DiskWriteOps(ImageId,ami-a1ffb63)]

The list_metrics call will return a list of all of the available metrics that you can query against. Each entry in the list is a Metric object. As you can see from the list above, some of the metrics are generic metrics and some have Dimensions associated with them (e.g. InstanceType=m1.small). The Dimension can be used to refine your query. So, for example, I could query the metric Metric:CPUUtilization which would create the desired statistic by aggregating cpu utilization data across all sources of information available or I could refine that by querying the metric Metric:CPUUtilization(InstanceId,i-e573e68c) which would use only the data associated with the instance identified by the instance ID i-e573e68c.

Because for this example, I'm only monitoring a single instance, the set of metrics available to me are fairly limited. If I was monitoring many instances, using many different instance types and AMI's and also several load balancers, the list of available metrics would grow considerably.

Once you have the list of available metrics, you can actually query the CloudWatch system for the data associated with that metric. Let's choose the CPU utilization metric for our instance.

>>> m = metrics[5]
>>> m
Metric:CPUUtilization(InstanceId,i-e573e68c)

The Metric object has a query method that lets us actually perform the query against the collected data in CloudWatch. To call that, we need a start time and end time to control the time span of data that we are interested in. For this example, let's say we want the
data for the previous hour:

>>> import datetime
>>> end = datetime.datetime.now()
>>> start = end - datetime.timedelta(hours=1)

We also need to supply the Statistic that we want reported and the Units to use for the results. The Statistic must be one of these values:

['Minimum', 'Maximum', 'Sum', 'Average', 'Samples']

And Units must be one of the following:

['Seconds', 'Percent', 'Bytes', 'Bits', 'Count', 'Bytes/Second', 'Bits/Second', 'Count/Second']

The query method also takes an optional parameter, period. This parameter controls the granularity (in seconds) of the data returned. The smallest period is 60 seconds and the value must be a multiple of 60 seconds. So, let's ask for the average as a percent:

>>> datapoints = m.query(start, end, 'Average', 'Percent')
>>> len(datapoints)
60

Our period was 60 seconds and our duration was one hour so we should get 60 data points back and we can see that we did. Each element in the datapoints list is a DataPoint object which is a simple subclass of a Python dict object. Each Datapoint object contains all of the information available about that particular data point.

>>> d = datapoints[0]
>>> d
{u'Average': 0.0,
u'Samples': 1.0,
u'Timestamp': u'2009-05-21T19:55:00Z',
u'Unit': u'Percent'}

My server obviously isn't very busy right now!

That gives you a quick look at the CloudWatch service and how to access the service in boto. These features are still under development and feedback is welcome so give it a try and let me know what you think.

Friday, May 8, 2009

Cloud Computing Hierarchy of Needs


With apologies to Abraham Maslow and his hierarchy of human needs, a somewhat tongue-in-cheek variation applied to the brave new world of Cloud Computing.

Creative Commons License
Cloud Computing Hierarchy of Needs by Mitch Garnaat is licensed under a Creative Commons Attribution-Share Alike 3.0 United States License.

Tuesday, April 28, 2009

Cloud Lock-In. Not your father's lock-in.

There seems to be a lot of angst about the risks of lock-in with cloud computing. I think there are some real issues to be concerned about but most of the discussion seems to be centered around API's and I think that's wrong.

First, let's define what we mean by lock-in. This description from wikipedia provides a good, workable definition:

In economics, vendor lock-in, also known as proprietary lock-in, or customer lock-in, makes a customer dependent on a vendor for products and services, unable to use another vendor without substantial switching costs. Lock-in costs which create barriers to market entry may result in antitrust action against a monopoly.

In the world of software development and IT, examples of things that have caused lock-in headaches would be:
  • Using proprietary operating system features
  • Using proprietary database features
  • Using hardware which can only run a proprietary OS
So, a typical scenario might be that you have a requirement to develop and deploy some software for internal use within your company. You do the due diligence and make your choices in terms of the hardware you will buy, the OS you will use, the database, etc. and you build and deploy your application.

But in the process of doing that, you have used features in the operating system or database or other component that are unique to that vendor's product. There may be have been good reasons at the time to do so (e.g. better performance, better integration with development tools, better manageability, etc.) but because of those decisions the cost of changing any of the significant components of that software becomes too high to be practical. You are locked-in.

In that scenario, the root cause of the lock-in problem seems to be the use of proprietary API's in the development of the application so it kind of makes sense that the focus of concern in Cloud Computing Lock-In would also be the API's. Here's why I don't think it's different for the Cloud Service case:
  • Sunk Cost - While the use of proprietary API's in the above example represent one barrier to change, a more significant barrier is actually the sunk cost of the current solution. In order to deploy that solution internally, a lot of money had to be spent upfront (e.g. hardware, OS server and client licenses, database licenses). To move the solution off the locked-in platform not only involves considerable re-write of the software (OpEx costs) but also new CapEx expenses and potential write-down of current capital. In the case of a Cloud Service, these sunk costs aren't a factor. The hardware and even the licensing costs for software can be paid by the hour. When you turn that server off, your costs go to zero.
  • Tight Coupling vs. Loose Coupling - Even if you focus only on the API's and the rework necessary to move the solution to a different platform, the fact that Cloud Computing services focus on REST and other HTTP-based API's dramatically changes the scope of the rework when compared to moving from one low-level tighly-coupled API to another one. By definition, your code that interacts with Cloud Services will be more abstracted and loosely-coupled which will make it much easier to get it working with another vendor's Cloud Service.
To see what the real lock-in concern is with Cloud Services, think about where the real pain would be in migrating a large application or service from one vendor to another. For most people, that pain will be around the data associated with that application or service. Rather than sitting in your data center, it now sits in that vendors cloud service and moving that, especially for large quantities of data will present a real barrier.

So, how do you mitigate that concern? Well, you could try to keep local backups of all data stored in a service like S3 but for large quantities of data that becomes impractical and diminishes the value proposition for a data storage service in the first place. The best approach is to demand that your Cloud Service vendors provide mechanisms to get large quantities of data in and out of their services via some sort of bulk load service.

Amazon doesn't yet offer such a service but I was encourage by this thread on their S3 forum which suggests that AWS is at least thinking about the possibility of such a service. I encourage them and other Cloud Services vendors like Rackspace/Mosso to make it as easy as possible to get data in AND out of your services. That's the best way to minimize concerns about vendor lock-in.

Sunday, April 26, 2009

Buying EC2 Reserved Instances with Boto

One of the great things about Amazon's EC2 service is the ability to scale up and scale down quickly. This elasticity really brings a whole new dimension to computing but one of the common criticisms on the forums early on was that if you didn't really need that elasticity, EC2 pricing seemed a bit high compared to some of the alternatives.

The new reserved instance feature in EC2 is a great way to save money on EC2 instances that you know you will be running most of the time. Basically, you pay some money up front and then get a much cheaper per-hour charge on that instance. If you leave a server up and running 24x7x365 the savings can be substantial.

Buying a reserved instance is a little strange. Rather than using an explicit transaction where you supply your credit card, etc. AWS chose to create a new API call in the EC2 service that purchases the reserved instance. For code monkeys like me, that's fine but some boto users were asking for a little wrapper around the process that would make the selection easier and reduce the risk of buying the wrong reservation.

So, I created a little Python script that guides you through the process and gives you the opportunity to review what you are about to buy and bail out if you make a mistake. At each step in the script, the available choices are presented to you in a simple command line menu. Once you make your choice, the script moves on to the next selection, etc. until all of the information is gathered.

The script is called buyreservation.py and it lives in the ec2 package of the boto library. It's included in the newest 1.7a release. To use the script, just "cd" to the boto/boto/ec2 directory and follow the prompts. A transcript of a session is shown below:

jobs:ec2 mitch$ python buyreservation.py
[1] RegionInfo:eu-west-1
[2] RegionInfo:us-east-1
EC2 Region [1-2]: 2
[1] m1.small
[2] m1.large
[3] m1.xlarge
[4] c1.medium
[5] c1.xlarge
Instance Type [1-5]: 1
[1] Zone:us-east-1a
[2] Zone:us-east-1b
[3] Zone:us-east-1c
EC2 Availability Zone [1-3]: 3
Number of Instances: 1

The following Reserved Instances Offerings are available:

ID=248e7b75-0799-4a55-a0cb-f8d28eb11921
Instance Type=m1.small
Zone=us-east-1c
Duration=94608000
Fixed Price=500.0
Usage Price=0.03
Description=Linux/UNIX
ID=4b2293b4-1e6c-4eb3-ab74-4493c0e57987
Instance Type=m1.small
Zone=us-east-1c
Duration=31536000
Fixed Price=325.0
Usage Price=0.03
Description=Linux/UNIX
[1] ReservedInstanceOffering:248e7b75-0799-4a55-a0cb-f8d28eb11921
[2] ReservedInstanceOffering:4b2293b4-1e6c-4eb3-ab74-4493c0e57987
Offering [1-2]: 2

You have chosen this offering:
ID=4b2293b4-1e6c-4eb3-ab74-4493c0e57987
Instance Type=m1.small
Zone=us-east-1c
Duration=31536000
Fixed Price=325.0
Usage Price=0.03
Description=Linux/UNIX
!!! You are about to purchase 1 of these offerings for a total of $325.00 !!!
Are you sure you want to do this? If so, enter YES:


If, at that point, you enter "YES" boto will go ahead and submit the API request to purchase the reserved instance(s), otherwise it will bail out. Hopefully the script provides enough guidance, handholding and confirmation to take some of the fear out of the process so go out there and save some money!